Root canal therapy (RCT) is a dental procedure designed to save a tooth that is severely infected or damaged. While the thought of a root canal can be intimidating for many, understanding the process can alleviate fears and help patients feel more prepared. In this article, we will provide a comprehensive, step-by-step breakdown of the root canal process, including what to expect during each phase.
Step 1: Diagnosis and Consultation
Before any procedure begins, a thorough diagnosis is essential. During your initial visit, your dentist will perform a comprehensive examination of your teeth and gums. This may include:
- Dental X-rays: These images help identify the extent of the infection, the condition of the bone around the tooth, and the overall anatomy of the root canal system.
- Symptoms Review: The dentist will ask about your symptoms, such as pain, swelling, or sensitivity to hot and cold, to assess the need for a root canal.
Once the diagnosis is confirmed, the dentist will explain the procedure, answer any questions, and schedule the treatment appointment.
Step 2: Anesthesia
On the day of the procedure, your dentist will administer local anesthesia to ensure that you remain comfortable and pain-free throughout the treatment. This may involve:
- Injection: A small needle will be used to deliver anesthesia around the affected tooth, numbing the area.
- Waiting Period: After the injection, the dentist will wait a few minutes for the anesthesia to take effect before proceeding.
For patients with anxiety or those who prefer extra comfort, sedation options such as nitrous oxide (laughing gas) or oral sedatives may be offered.
Step 3: Tooth Isolation
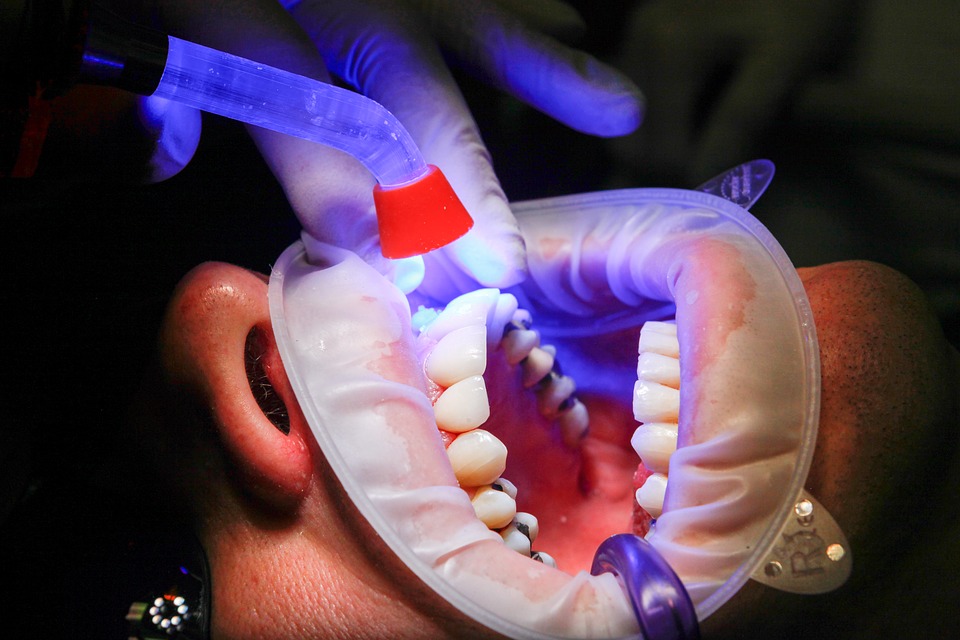
To maintain a clean and dry working area, your dentist will place a rubber dam around the tooth. This small sheet of rubber prevents saliva from contaminating the treatment area, ensuring a sterile environment for the procedure.
Step 4: Access Opening
Once the tooth is isolated, the dentist will create a small access opening in the crown (the top part) of the tooth. This opening allows access to the pulp chamber and root canals. Using specialized instruments, the dentist will carefully remove any decayed material from the tooth.
Step 5: Cleaning and Shaping
After accessing the root canal system, the dentist will clean and shape the canals to prepare them for filling. This process involves:
- Removing Pulp Tissue: The infected or damaged pulp is carefully extracted using files that are specifically designed for this purpose. The dentist will remove all debris and infected tissue from within the canals.
- Irrigation: A disinfecting solution (often sodium hypochlorite) is used to flush out any remaining debris and bacteria, ensuring the canals are clean.
- Shaping the Canals: The dentist will shape the canals to make them easier to fill. This is done with specialized instruments to create a smooth and tapered shape.
Step 6: Filling the Canals
Once the canals are thoroughly cleaned and shaped, the next step is to fill them. The dentist will use a biocompatible material called gutta-percha to seal the canals and prevent bacteria from re-entering. This process includes:
- Filling the Canals: Gutta-percha is placed into the canals, filling them to prevent reinfection.
- Sealing the Access Opening: After the canals are filled, the access opening in the crown is sealed with a temporary or permanent filling material.
Step 7: Post-Treatment Evaluation
After the root canal procedure is completed, your dentist will schedule a follow-up appointment to evaluate the treatment’s success and assess healing. During this visit, the dentist will:
- Examine the Tooth: Check for any signs of infection or complications.
- X-rays: Take follow-up X-rays to ensure that the canals are adequately filled and there are no signs of reinfection.
Step 8: Restoration of the Tooth
In most cases, a tooth that has undergone a root canal will require further restoration to regain its strength and functionality. This usually involves:
- Crown Placement: A dental crown is often placed over the treated tooth to provide protection and restore its original shape and function. Your dentist will take impressions and may place a temporary crown until the permanent one is ready.
- Follow-Up Care: After the restoration, your dentist will provide care instructions and may schedule additional follow-ups to monitor your tooth’s condition.
What to Expect After the Procedure
After a root canal, it’s common to experience some discomfort, swelling, or sensitivity in the treated area. Here are a few tips for managing post-treatment care:
- Pain Management: Over-the-counter pain relievers, such as ibuprofen or acetaminophen, can help alleviate discomfort.
- Diet Modifications: Stick to soft foods for the first few days and avoid chewing on the treated tooth until your dentist confirms it is ready for normal function.
- Follow-Up Appointments: Attend all scheduled follow-up appointments to ensure proper healing and address any concerns.
Conclusion
Understanding the root canal process can help demystify the procedure and ease any anxiety you may have. With advancements in dental technology and techniques, root canal therapy is now a more comfortable and effective treatment option. If you’re experiencing dental pain or believe you may need a root canal, don’t hesitate to consult your dentist for a thorough evaluation. Remember, timely treatment can save your tooth and protect your overall oral health.


